Portworx is a solution for data management on Kubernetes, but one area that surprised me was that our support extended to the KubeVirt project. Kubevirt is funded by RedHat, and a number of my customer have asked about the feasibility of using Portworx for virtualization.
KubeVirt is an open-source project, and although I configured the project on generic Kubernetes installations, RedHat Openshift has the best integration I have found so far. For this article I want to chronicle the first part of my journey: How would I move a virtual machine from my VMware environment to an Openshift Virtualization environment?
I started with an Openshift cluster that was running on virtual machines in my environment (using virtualization passthrough). I then installed Portworx (more on the why of that later).
VMware Migration Prerequisites
In order to convert VMware VMs, we will need to do two things. First, we need to capture the SHA1 of our vCenter certificates. Run the following to get your SHA1 fingerprint, you will need it later.
echo | openssl s_client -connect 10.0.1.10:443 | openssl x509 -noout -fingerprint -sha1
...
SHA1 Fingerprint=EF:82:09:1D:C2:69:80:F3:A3:00:3B:53:F6:EC:86:E3:8C:98:83:20
Next, we will need to build a quick container that contains the Virtual Disk Development Toolkit (VDDK). Ensure you have docker or podman (or something similar) and are connected to a registry. Download and extract the VDDK:
tar zxfv ./VMware-vix-disklib-7.0.3-20134304.x86_64.tar.gz
Create a new file called Dockerfile, it should be in the same directory that you extracted the above in to. Place the following content in the file:
FROM registry.access.redhat.com/ubi8/ubi-minimal
USER 1001
COPY vmware-vix-disklib-distrib /vmware-vix-disklib-distrib
RUN mkdir -p /opt
ENTRYPOINT ["cp", "-r", "/vmware-vix-disklib-distrib", "/opt"]
Now let’s build and push our new container to a repo:
docker build . -t ccrow42/vddk:latest
docker push ccrow42/vddk:latest
Obviously, replace your tag with your repo (or hell, use my uploaded image and save yourself some steps!)
Installing the Migration Toolkit
I should mention that this article is not designed to be a step-by-step tutorial but to simply document the overview and resources I have used.
The first step was to read through the documentation here. (Just kidding, but wanted to cite my sources)
I then installed the operator. This installation will prompt you to install the forklift controller.

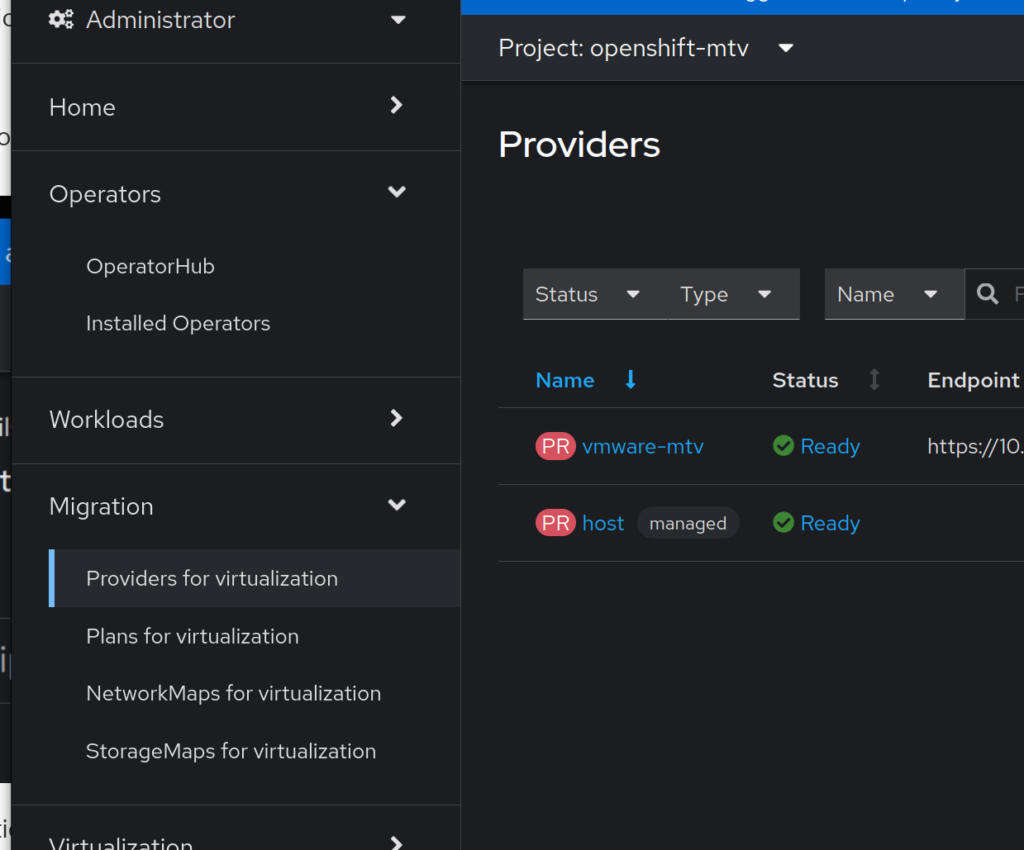
Reload your web interface and you will see a migration section on the menu. Let’s head over to the virtualization providers. Be sure change your project to openshift-mtv (if that is indeed where you installed the operator):

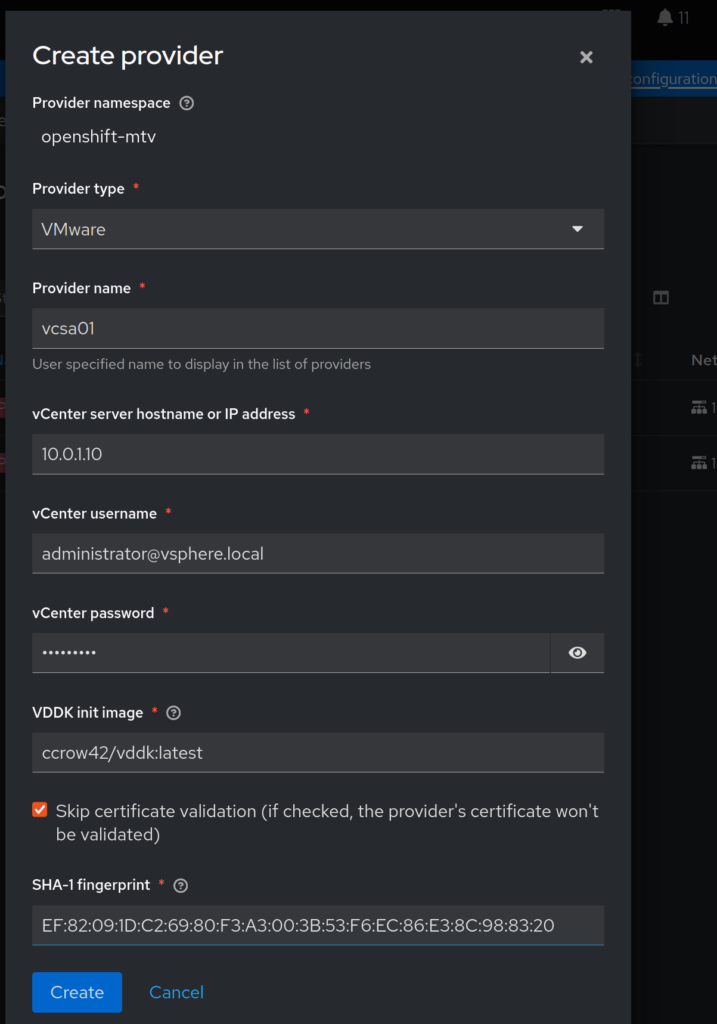
Let’s connect Openshift to VMware by clicking the Create Provider button:

Last, we simply need to create a Migration Plan, head over to the Plans for Migration section and select: Create Plan.
This process is straightforward, just select the source and destination. If you are not familiar with Portworx, just use the px-db storage class for now.
There are two ways of importing VMs, one is to use a cold migration, and the other a warm migration (which requires CBT).
Although this covered the migration steps, there are a few considerations around storage and networking that I will cover in a later article.
Why would I use Portworx Enterprise for this?
Portworx provides the same benefits to Opershift Virtualization as it does to other container workloads. The two that are very important:
- Migration and DR: The ability to take a VM and move it to a new cluster, or to create DR plans for the VM.
- Because Portworx supports RWX access on block devices, we enable a live migration of virtual machines.